

Create your first form
Kickstart your form-building journey with step-by-step instructions for using Mokaform.
Build a professional form in minutes. This guide walks you from blank page to published link, with best practices to boost completion rates.
Overview
- Create your form
- Add and customize questions
- Make it smarter with logic, references, URL parameters, and variables
- Brand it and preview on mobile
- Publish, share, and track responses
- Troubleshoot common issues
1) Create your form
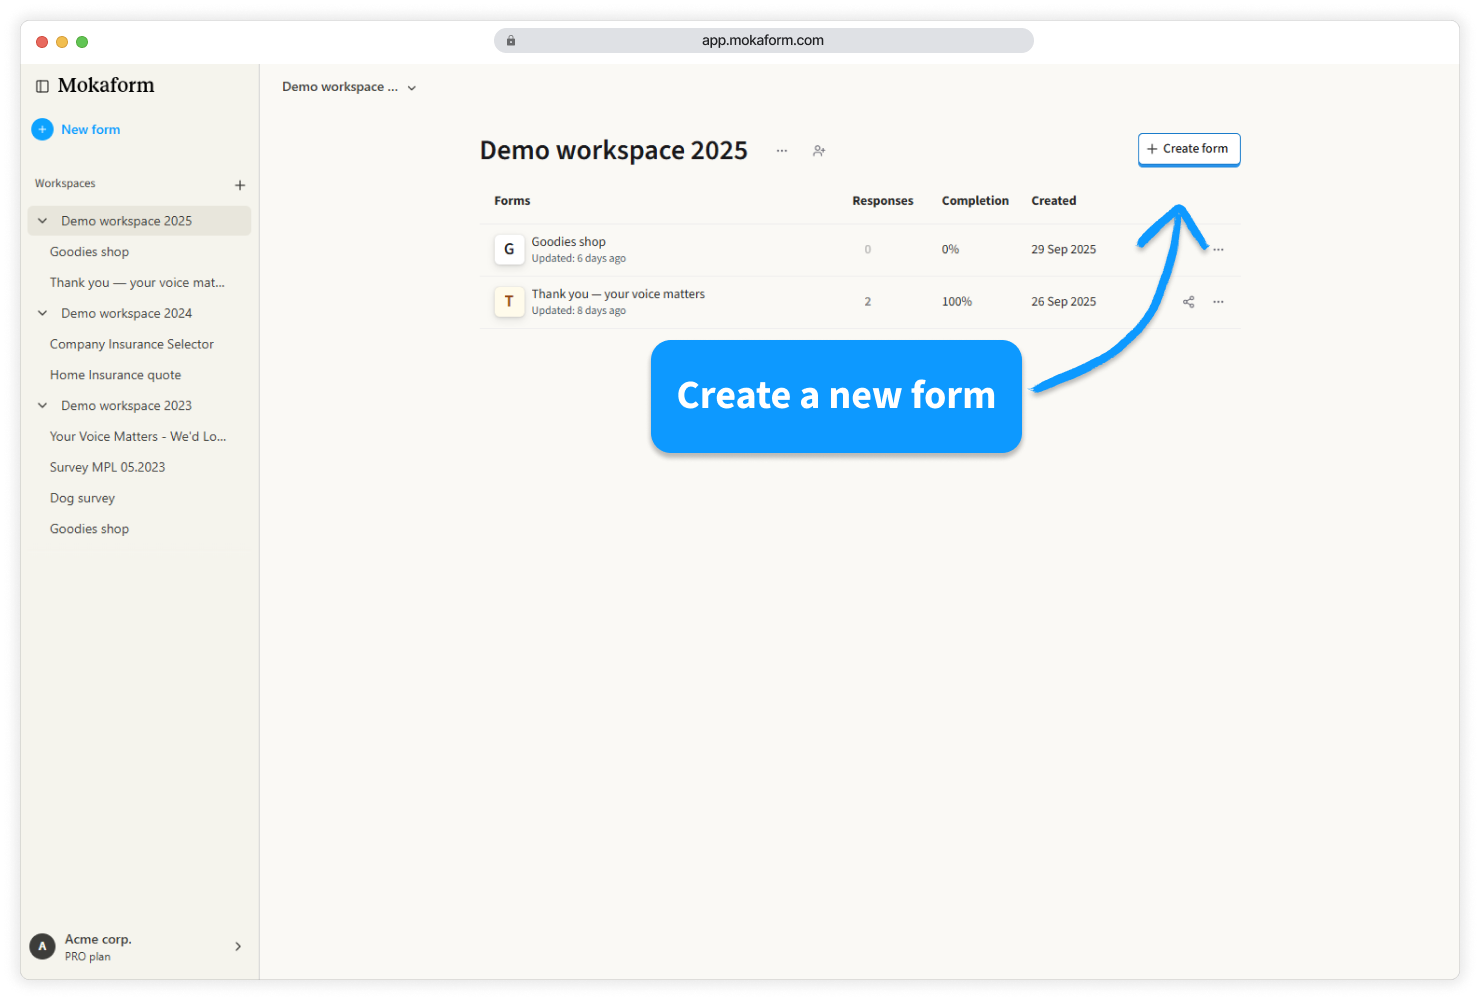
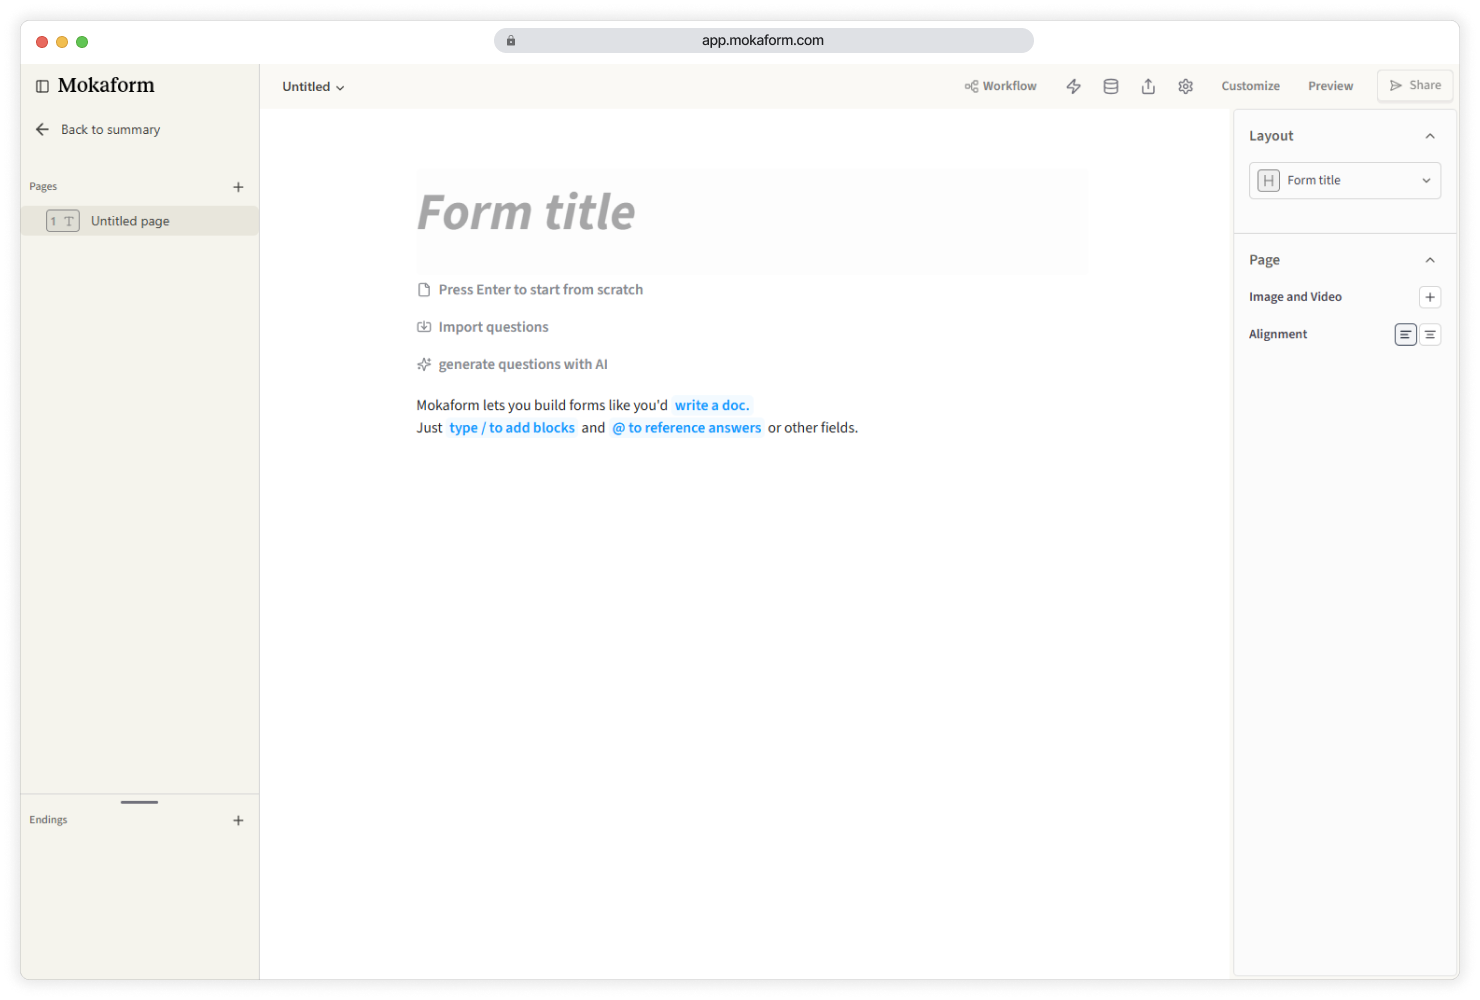
Click + Create a new form in the left sidebar of your dashboard.
If prompted, select the workspace to create it in.
Choose a starting method:
- Start from scratch for full control
- Import questions by pasting from docs or spreadsheets
- Generate with AI to get a draft from your goal or prompt
2) Add questions
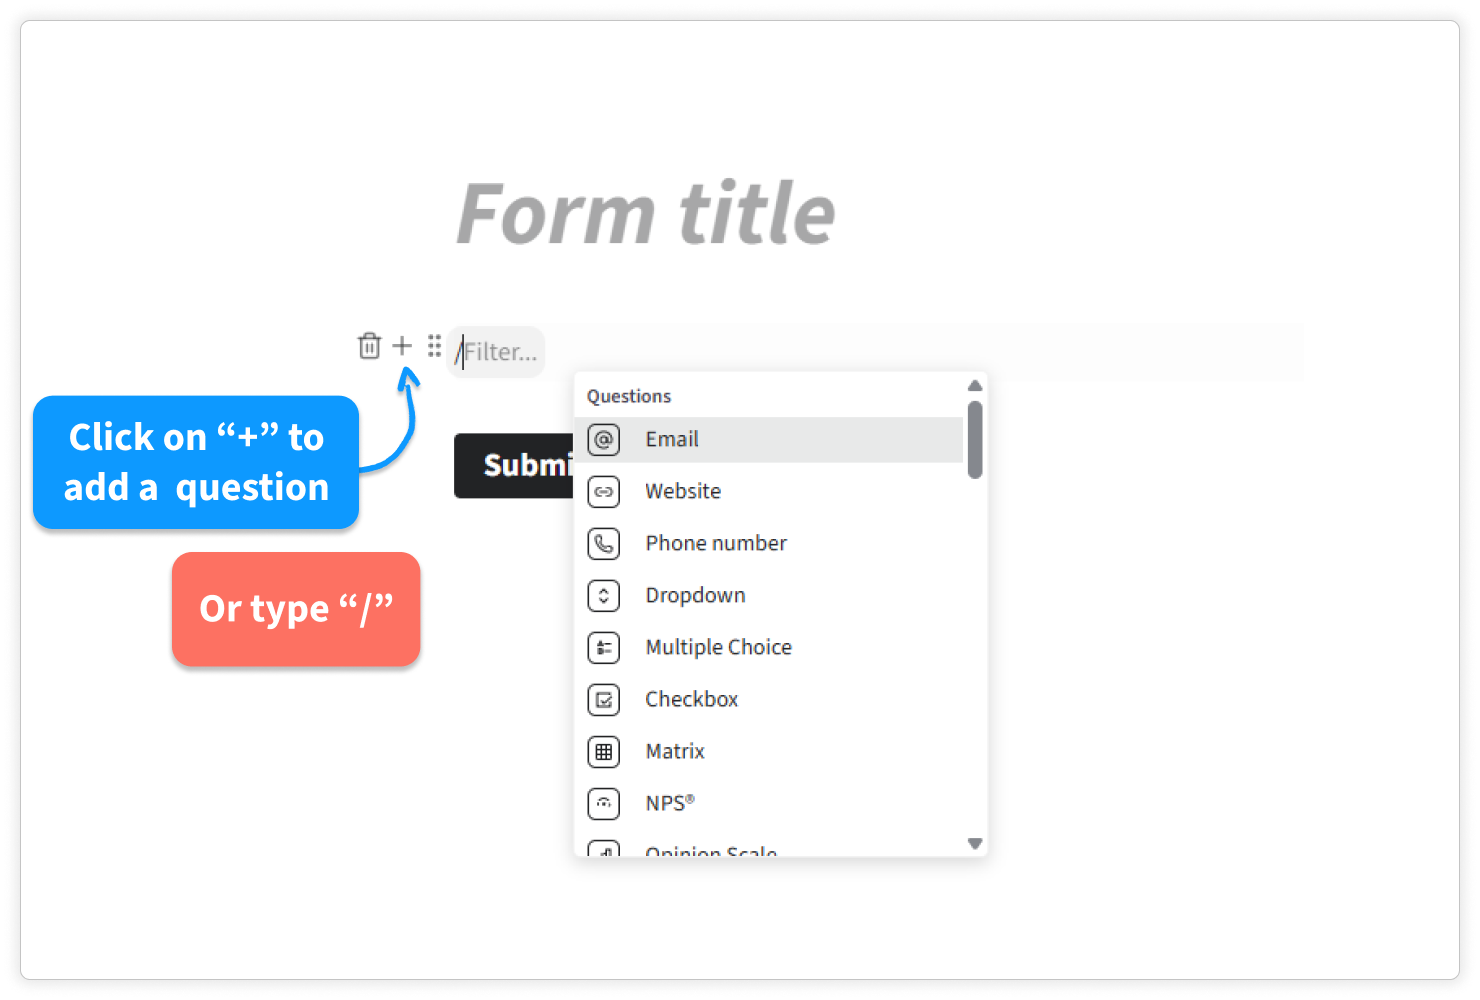
Mokaform feels like writing a document:
Type / to insert question types: short text, long text, email, number, multiple choice, rating, file upload, and
more.
Just start typing to add explanatory text between questions.
3) Customize questions
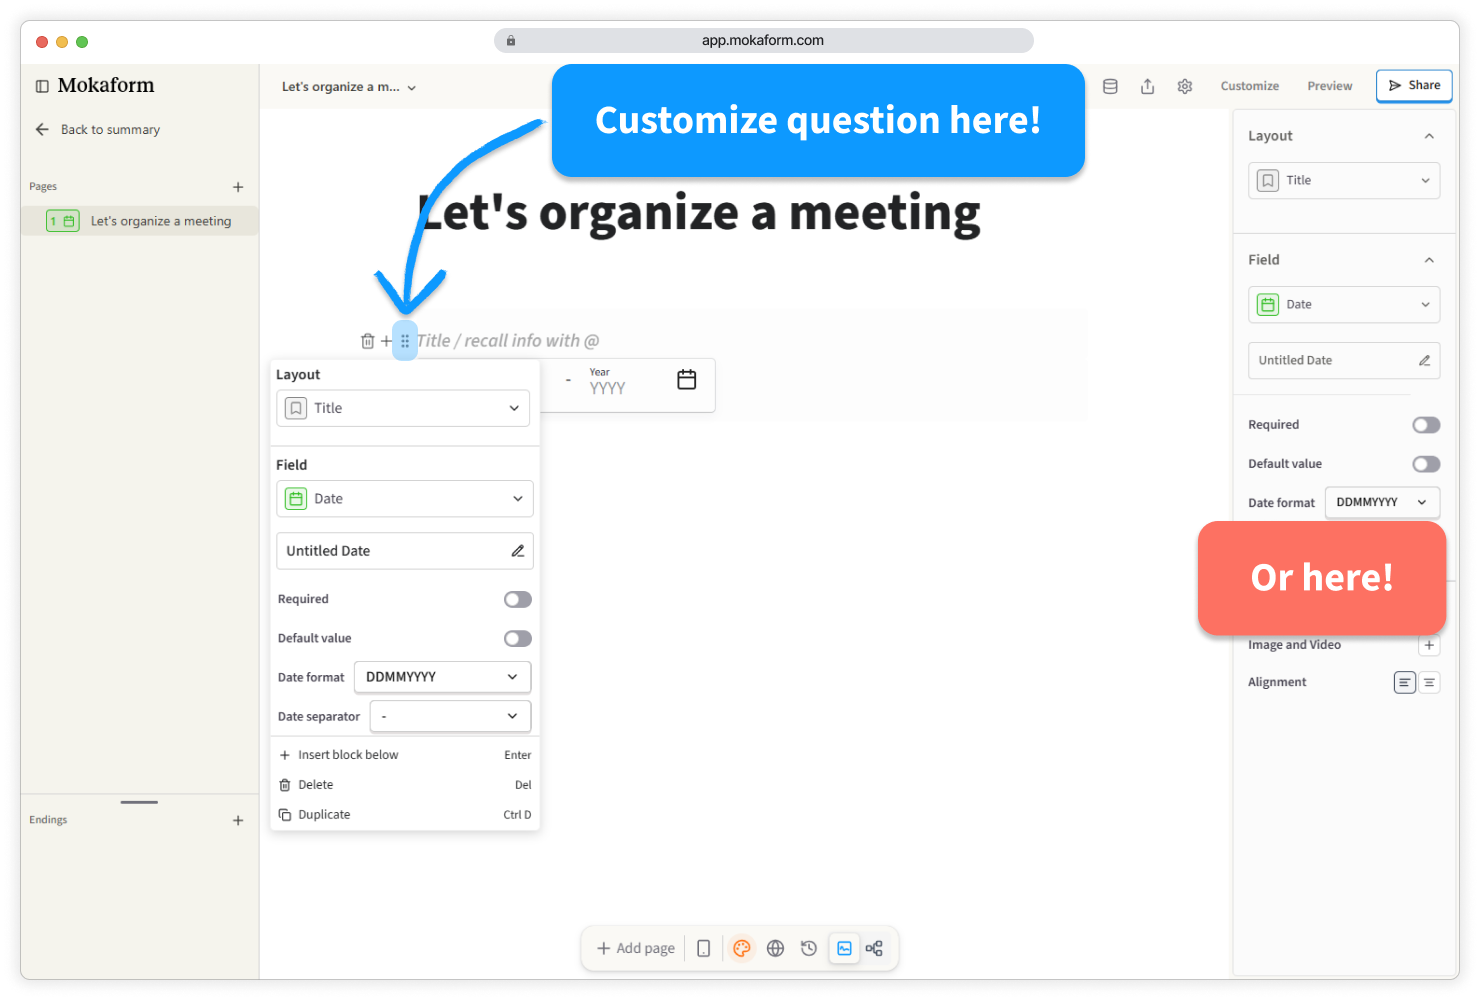
Click any ⋮⋮ icon to open settings such as:
- Toggle Required for essentials only
- Add clear Placeholder text, e.g.
name@company.comfor an email question - Use Help text to clarify complex questions
- Set Validation for emails, URLs, phone numbers, or number ranges
- For choice questions, add an other option as needed
4) Make your form smarter
Reference previous answers
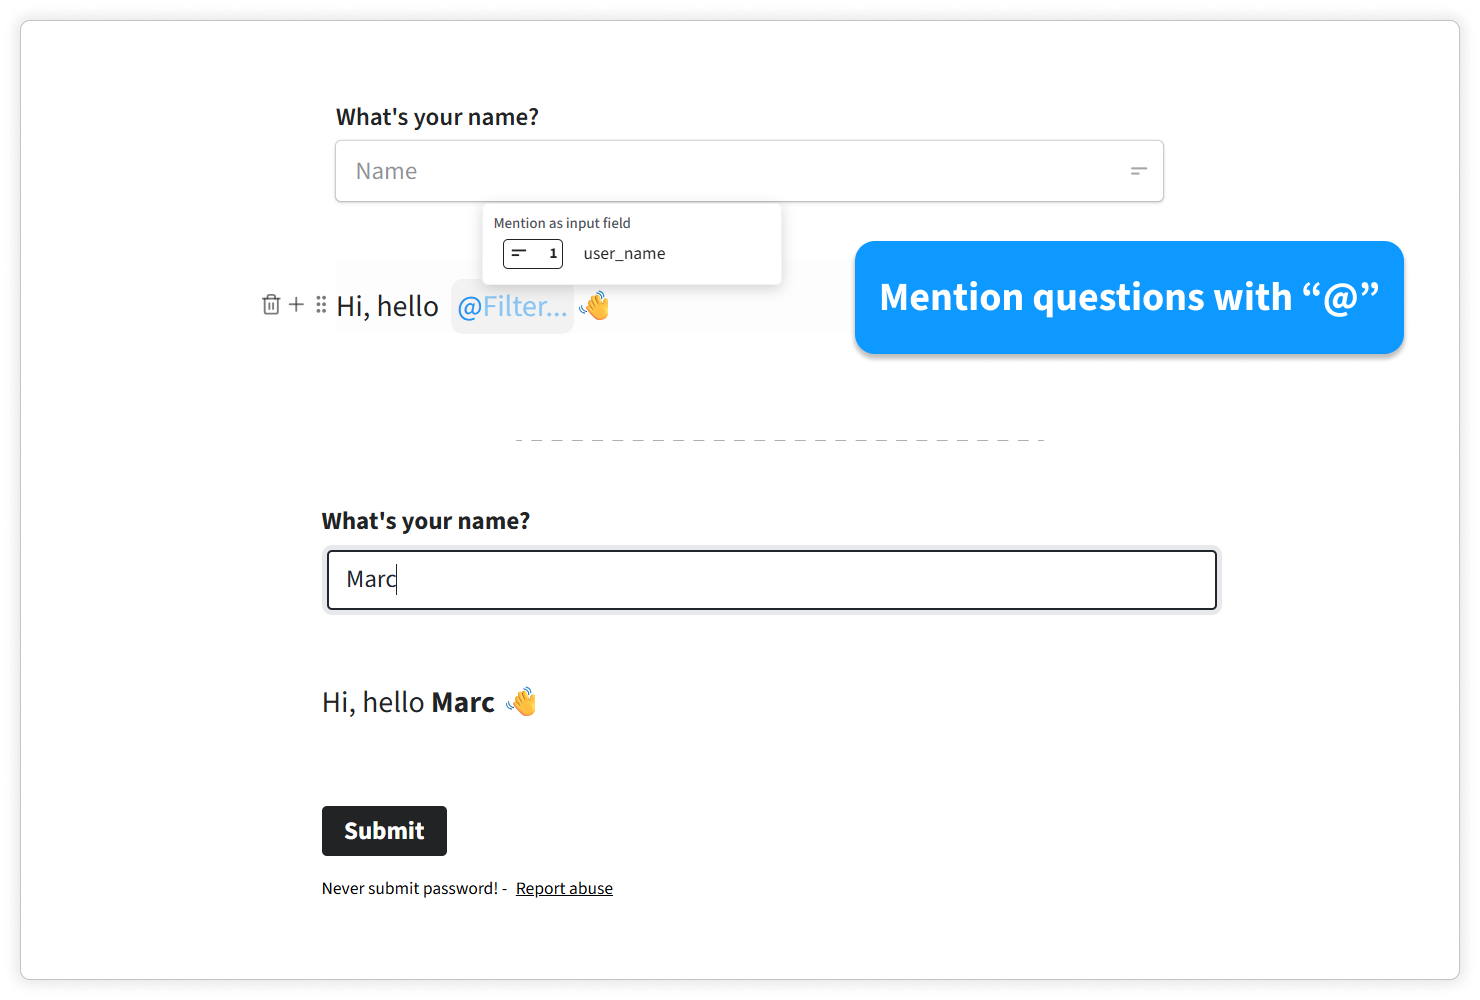
Type @ while editing any text to mention an earlier answer.
- Example: “Thanks @Name — what’s your budget?”
- Use in question text, descriptions, or post-submit messages for a conversational feel
Conditional logic
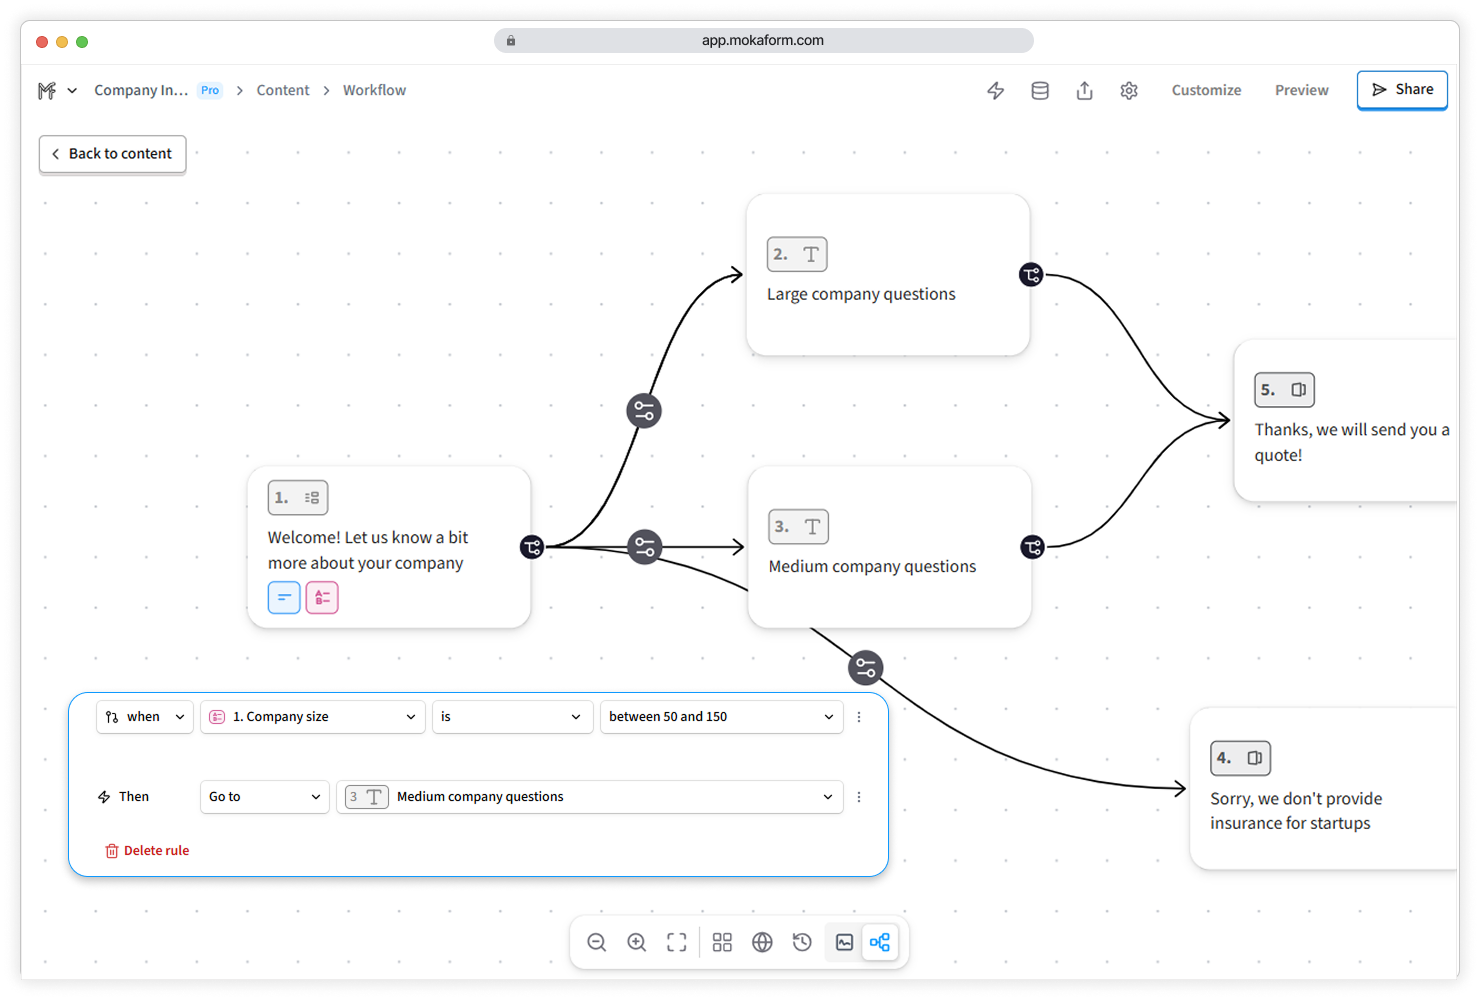
In the Workflow tab, show questions only when relevant:
- Follow-up pricing questions only if “Interested in purchasing” is selected
- Ask company size only for business customers
- Branch follow-ups based on satisfaction ratings
URL parameters (pre-fill)
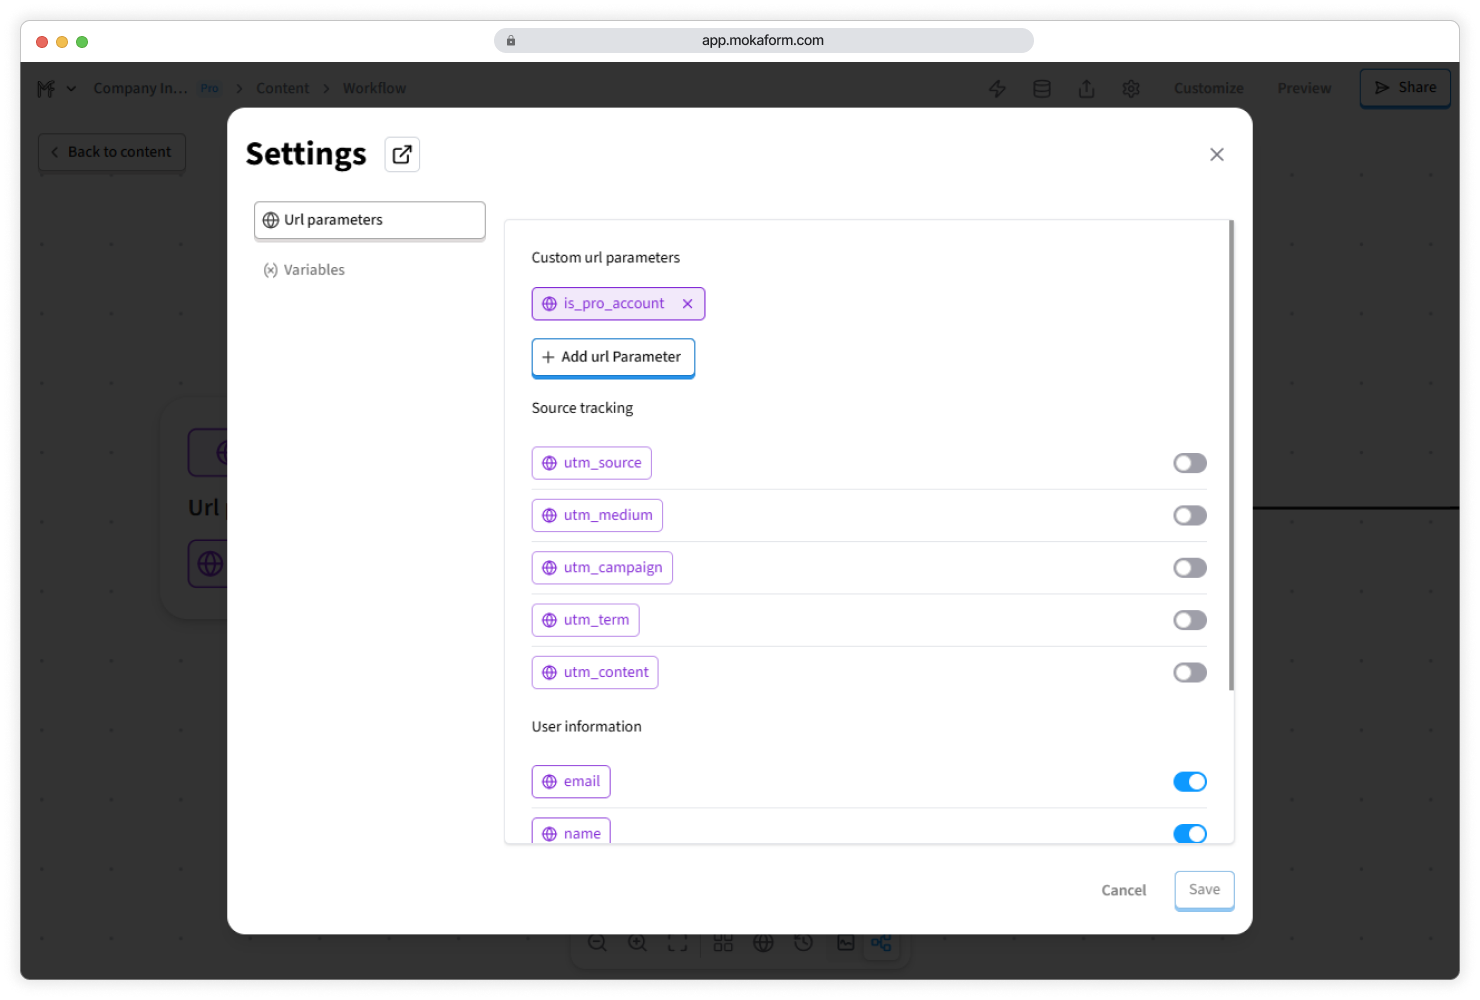
Pre-fill specific fields by adding parameters to the form URL:
https://your-form-link?name=Sarah&company=Acme
Great for:
- Event registrations when attendee info is known
- Customer feedback with known account details
- Sales follow-ups with CRM data
Variables
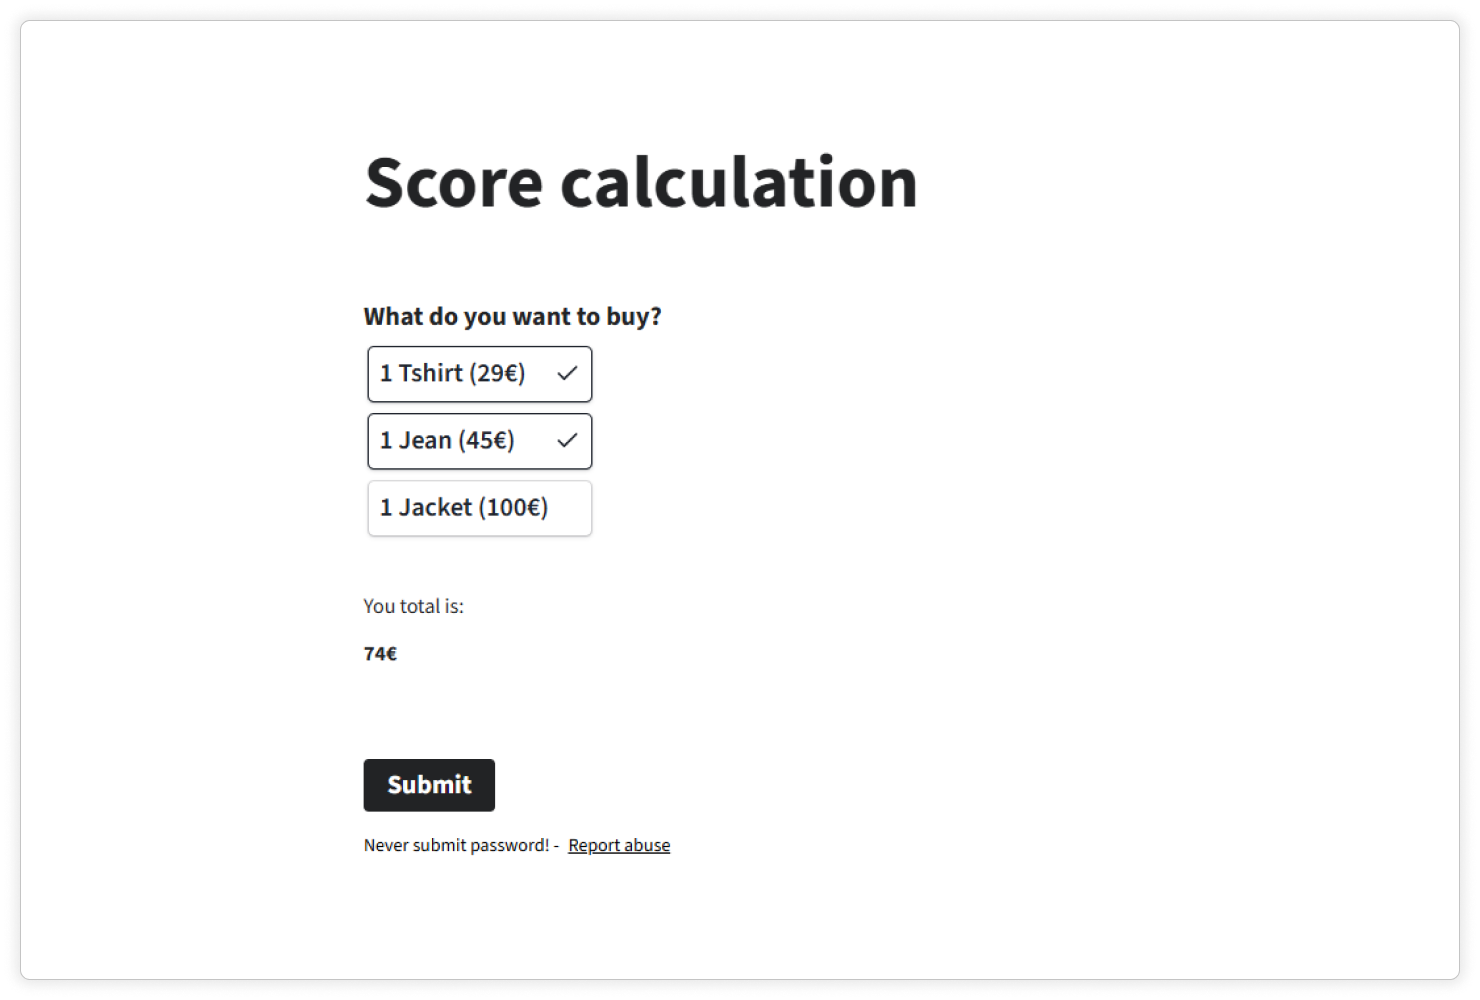
Variables are calculated fields for math and text operations behind the scenes.
- Calculate totals: prices × quantities, tax, shipping
- Score quizzes automatically
- Concatenate or format text
- Create conditions based on computed values
Common use cases:
- Order forms: running totals and final price
- Quizzes: points and result messages
- Lead scoring: weight answers like budget and timeline
- Event fees: compute based on options
5) Make it look professional

Use the Customization panel to match your brand:
- Fonts that match your site
- Text, background, and button colors
- Button placement optimized for mobile (sticky at bottom is often best)
- Optional custom CSS for pixel-perfect control
Also on each page:
- Click Add cover to include a header image
- Click Add logo to display your brand
6) Test before you share
Use Preview and complete the form like a real respondent.
- Do all questions make sense on first read?
- Are required fields truly necessary?
- Does it work smoothly on a phone?
- Is the thank-you message clear and actionable?
Fix anything that feels awkward or causes hesitation before you publish.
7) Publish and share
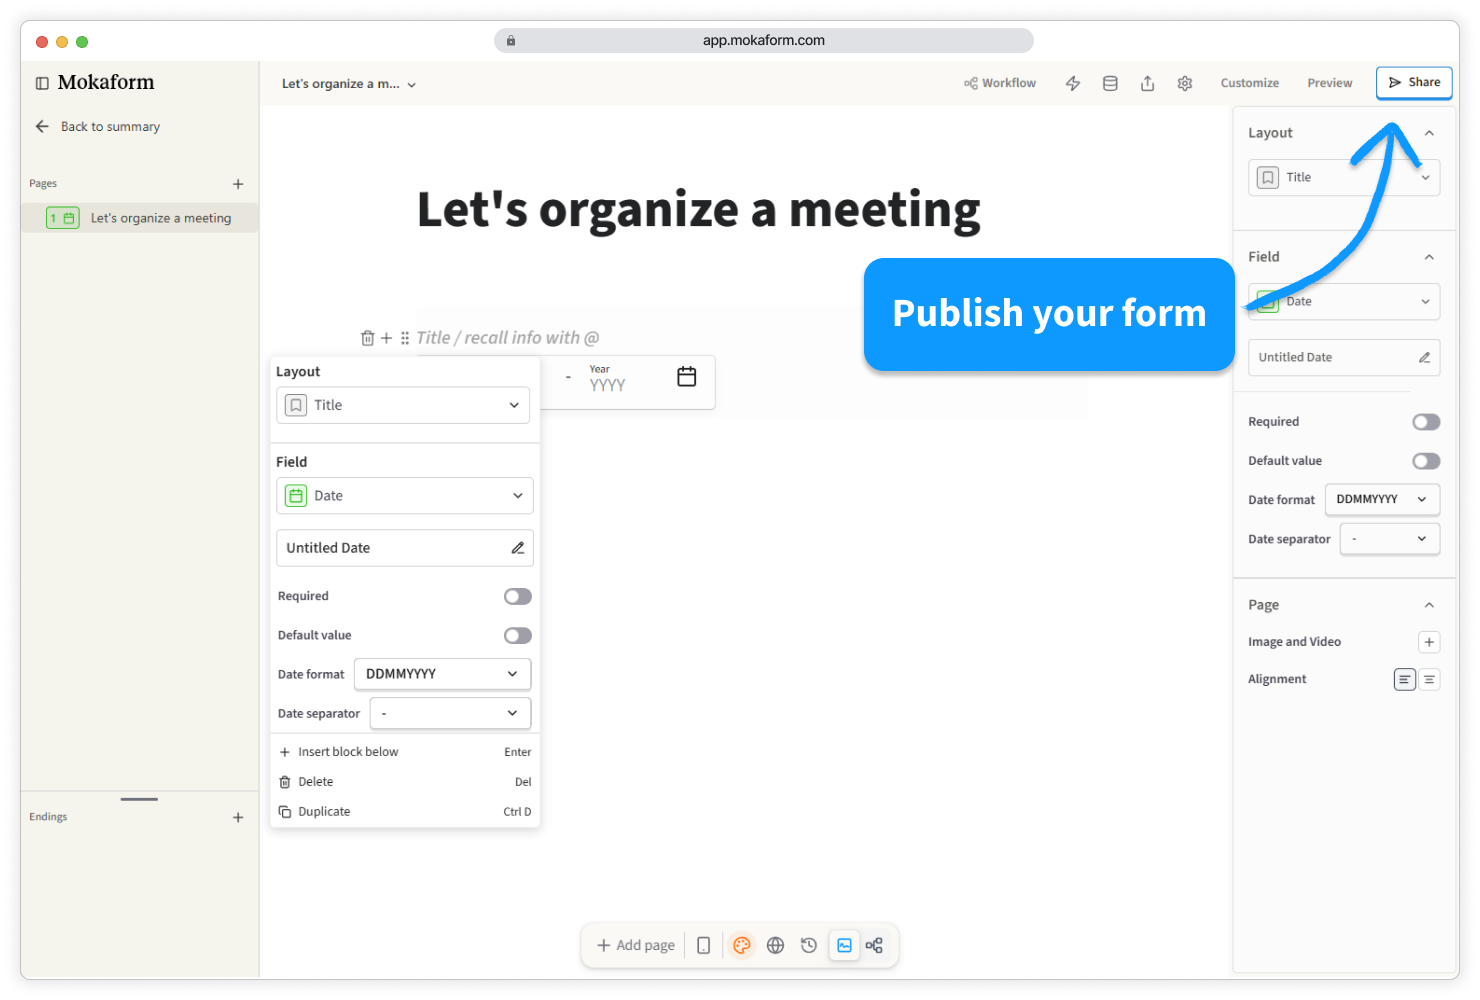
Click Share to make your form live.
Copy the form link and share it.
Open the Share tab for additional options.
You can:
- Email the link to contacts
- Post on social media
- Embed on your website
- Add to your email signature
8) After you publish
Responses appear immediately in your dashboard, including:
- Starts vs. completions
- Individual responses with timestamps
- Basic completion analytics
Enable notifications to get alerts for new responses. Export data to spreadsheets or downstream tools anytime.